In this blog post, we’ll see how to copy data of an entity “Contact” in D365 CE to Azure SQL Database. Let’s follow the below steps to see it in action.
- Login to Azure portal.
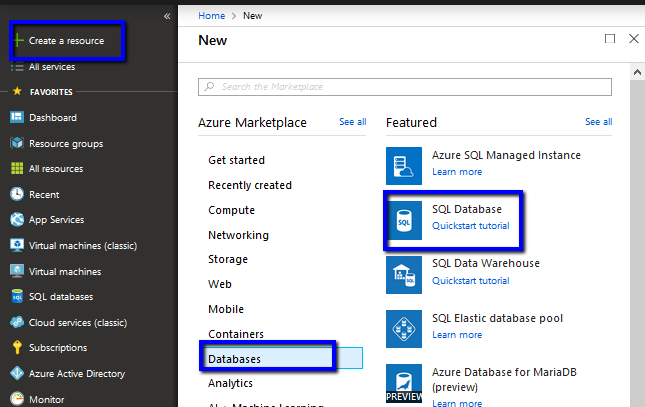
- Create Azure SQL Database where we need to copy the data. Click Create a resource –> Databases –> SQL Database
- Give a unique name to the database. Click on server field to create a Azure SQL Server. Give a unique name to the Azure SQL server, username and password for logging in. Click Select.

- Make sure the Azure SQL Server just created is selected as Server while creating the Azure SQL Database –> Click on Create.

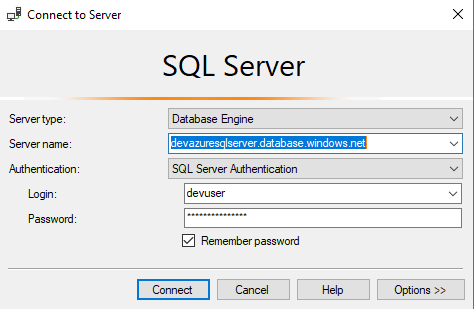
- Connect to the Azure SQL Server just created using SSMS. Here, we’ll have to add machine IP or range of IP address after clicking Connect.
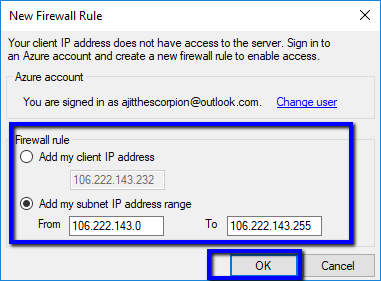
- After signing in using Azure credential, select range of IP address and click on OK.
- Once we see the database that we just created after connecting to the Azure SQL server, let’s create a table “Contact” using below script where data will be copied from D365 CE Contact entity.

create table Contact
(
contactid UNIQUEIDENTIFIER null,
fullname nvarchar(100),
firstname nvarchar(100),
mobilephone nvarchar(100),
emailaddress nvarchar(100),
lastname nvarchar(100)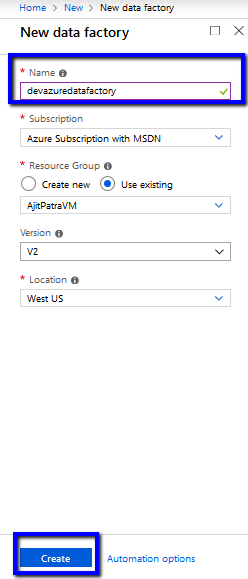
)- Let’s go to Azure portal to create Azure Data Factory. Click on Create a resource –> Analytics –> Data Factory.

- Give a unique name to the data factory, fill the mandatory fields and click Create.
- Let’s browse through the data factory –> Click on Author & Monitor.

- Click on Create Pipeline.

- Search for Copy Data Activity and drag it to the Canvas.

- Click on Source Tab –> Click New.

- Select Dynamics 365 –> Click Finish.

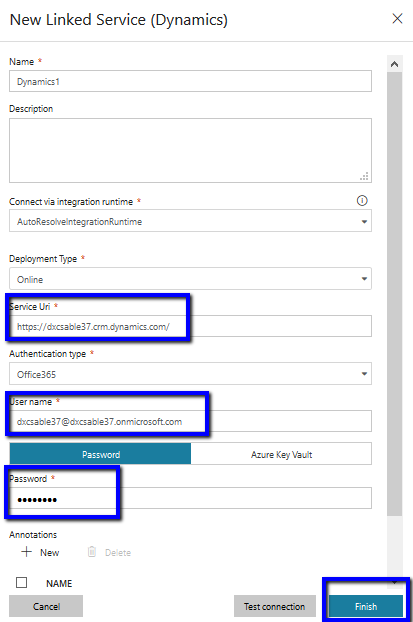
- Go to Connection Tab –> Click New

- Fill the organisation details, credential and click Finish.
- Select Contact entity from the dropdown.

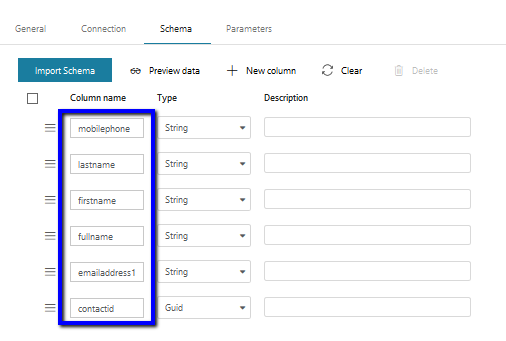
- Go to Schema Tab –> Click on Import Schema

- Keep only the columns that we are going to copy and delete rest of the column names.
- Click on Sink Tab of the pipeline and click New
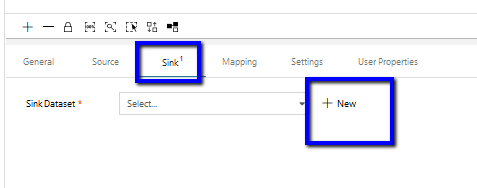
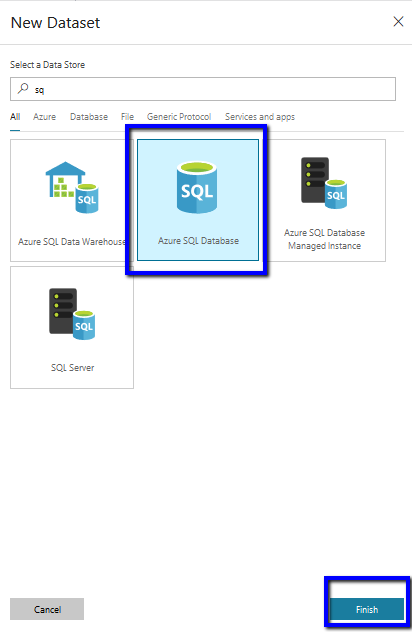
- Select Azure SQL Database –> Click Finish
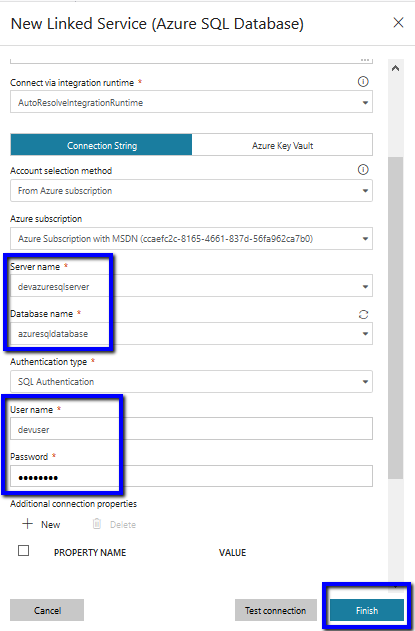
- Go to Connection Tab –> Click New

- Fill the Azure SQL server details, Azure SQL Database, credential and click Finish.
- In the Connection Tab, select Contact from the dropdown.

- Go to Schema Tab –> Click Import Schema to load the columns of the destination table.
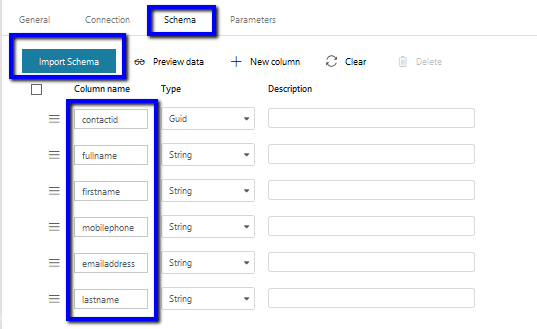
- Click on Mapping Tab of pipeline –> Click on Import Schema –> The mapping should be populated automatically among source and destination fields. If the field mapping is wrong then here we can correct it.

- Once done, Publish the changes.

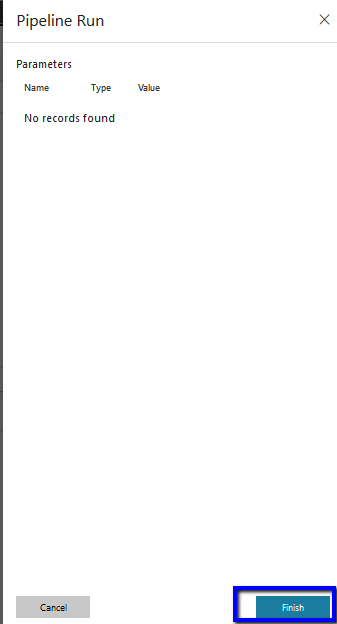
- Click on Trigger –> Trigger Now from the pipeline.

- Click Finish.
- Let’s wait for the pipeline to run successfully.

- Once the pipeline is executed successfully, let’s compare the data between source and destination.
- In Source, D365 CE Contact entity has 52 records.

- In the destination Azure SQL Database, Contact table also has 52 records.
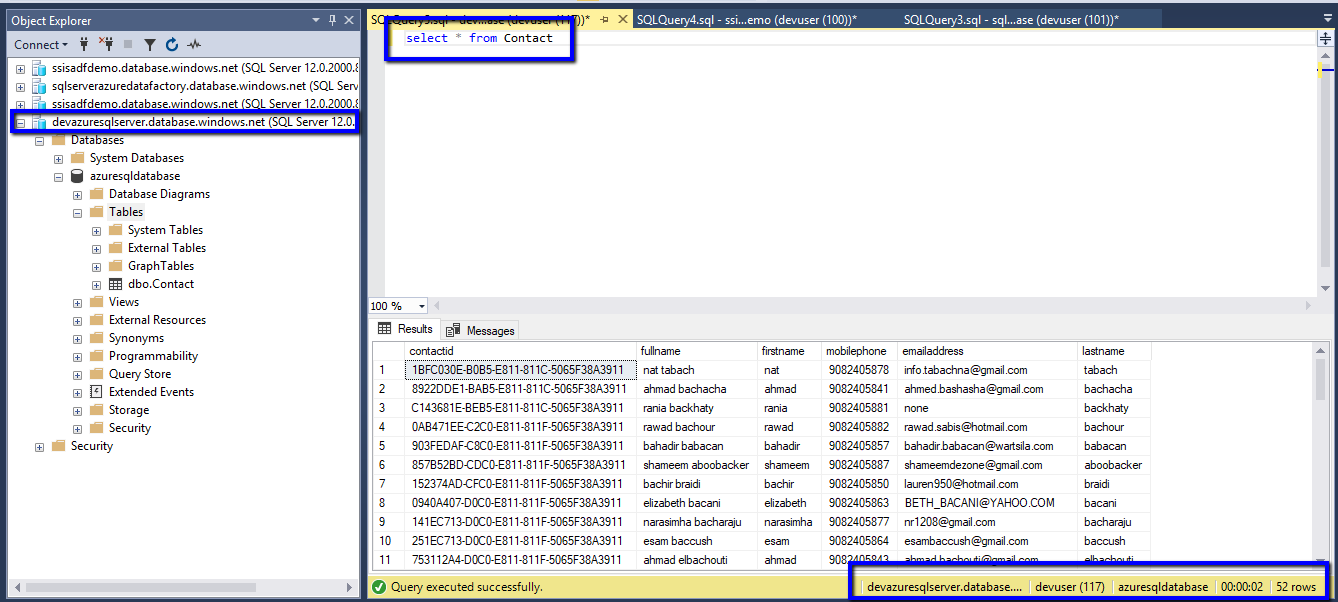
So, the data has been copied from D365 CE to Azure SQL Database successfully.
Hope it helps !!


Reblogged this on Nishant Rana's Weblog.
LikeLike
Hi Ajit,
Is this a possible replacement of the Data Export Service and a replacement of Kingsway Soft?
Thanks and have a great weekend.
LikeLike
Hi Ivo,
It’s not a replacement. Rather, it’s another way of integration like data export service and Kingsway soft.
Thanks,
Ajit
LikeLike
Each time the data is copied, does it create duplicates in the SQL table? or does it handle delta’s as well?
LikeLike
Hi Brennan, The example in this blog will create duplicates in the SQL table as delta is not handled. You can refer the below link to know how to get delta only: https://docs.microsoft.com/en-us/azure/data-factory/connector-dynamics-crm-office-365.
Thanks,
Ajit
LikeLike
Hi there
How does this apply to fetching data from Business Central? Are the steps the same? I am unsure if BC has a Service URI?
LikeLike
Hi Jakob, unfortunately I have not explored Business Central yet.
LikeLike