In this blog post series, we’ll learn how to execute SSIS package using Azure Data Factory. This topic is divided into 2 parts:
In the first part we’ll create the required Azure resources and in the second part we’ll see how to deploy and execute the package.
To begin we need following Azure resources:
- Azure SQL Server
- Azure SQL Databases
- Azure Data Factory V2
- Azure SSIS Integration Runtime
Follow the below steps to create the required Azure resources:
- Login to Azure Portal with Azure subscription account.
Create Azure SQL Server and Azure SQL Database
Click on Create a Resource –> Databases –> SQL Database

Give a unique name to the database. Click on Server field to create a new Azure SQL Server. Give a unique name to the server, fill the mandatory fields Login Admin, Password, Location and click Select.

The created Azure SQL server will be selected for the SQL database that we are going to create. Click on Create to create the Azure SQL Database.

Similarly, create destination SQL Database selecting the same Azure SQL Server that we have created and click on Create.

After creating Azure SQL Server, source and destination Azure SQL Databases let’s verify them using SQL Server Management Studio.
Fill the server name, credential and click on Connect.

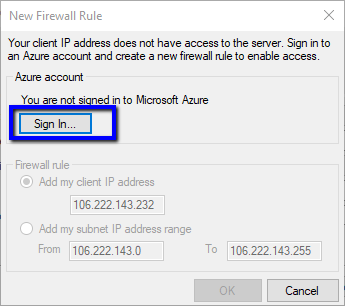
To access Azure SQL Server, we need to add the IP address of the machine or a range of allowed IP addresses in Firewall and Virtual Networks settings of Azure SQL Server in Azure portal.
However, in SSMS v17.0, we have the ability to do that setting on click of Connect above. A new pop up will be shown to create the firewall rule where we need click on Sign In to login with the Azure credential.
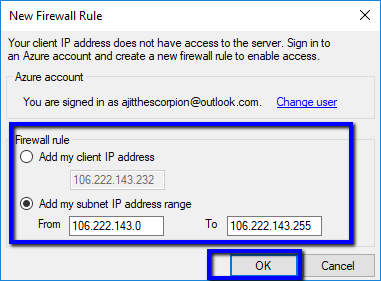
After successful login, we can add specific IP address of the machine or a range of IPs. We can select range of IPs to be on safe side as after each internet disconnection the IP address will probably be changed. Then Click OK.
After successful creation of Firewall rule, we should be able to see the databases that we have created so far.

We can verify that the above firewall rule has been created for the Azure SQL Server in Azure portal.

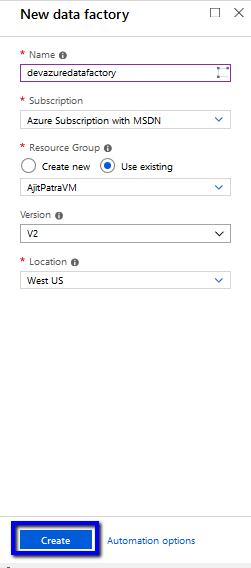
Create Azure Data Factory
Click on Create a Resource –> Analytics –> Data Factory

Give a unique name to the data factory, fill the mandatory fields. Select Version as V2 as we are going to work with SSIS package which has been introduced with ADF V2. Click on Create
Browse through the data factory created and Click on Author and Monitor

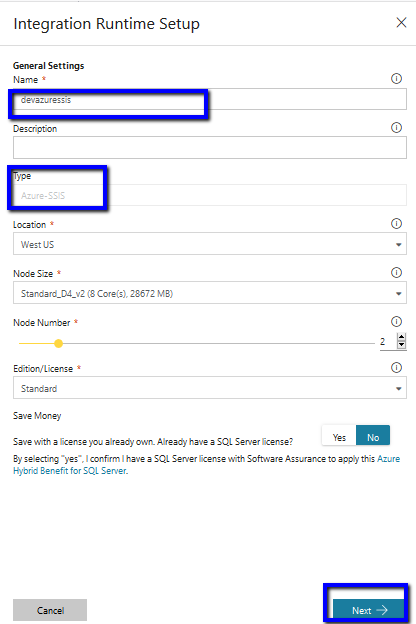
Create Azure SSIS Integration Runtime(IR)
On click on Author & Monitor you should see below screen where we’ll create Azure SSIS IR by clicking Configure SSIS Integration Runtime. This IR is needed whenever we need to work on SSIS package using ADF.

Give a unique name to IR. Click on Next
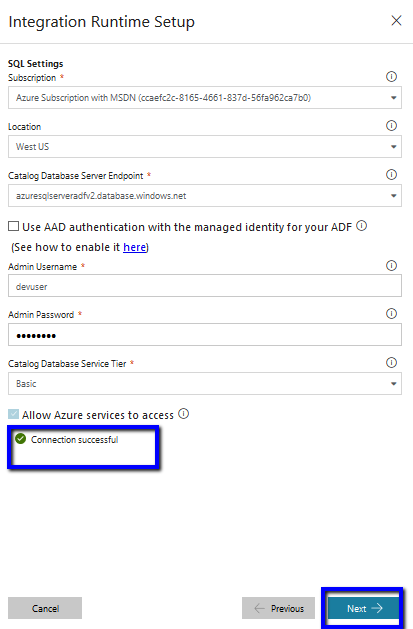
Select the Azure SQL Server that we have created above. Fill the credential to login to the SQL server and click Test Connection.

When Connection Successful message appears we can click Next
Click on Finish to create the Azure SSIS IR.

It’ll take almost 15-20 minutes to be up and running.

So far, we have covered creating Azure SQL Server, Azure SQL databases and Azure Data Factory.In the next part of this post, we’ll write a package which will load the data from source to destination database tables and will see how to deploy and execute that package.


2 thoughts on “Azure: Execute SSIS Package using Azure Data Factory – Part 1”