In this post, we’ll see how we can generate word document using content controls and PowerAutomate.
We’ll save the generated document in appropriate folder in Sharepoint so that it shows up on the appropriate Lead record. Then, we’ll convert the word document to pdf document and store at the same location.
To proceed, let’s create a word document with content controls. For demo purpose, we’ll put a lookup field(Preferred Accommodation) of Lead entity and related(Rates) records of this lookup field. Below are the steps to do it:
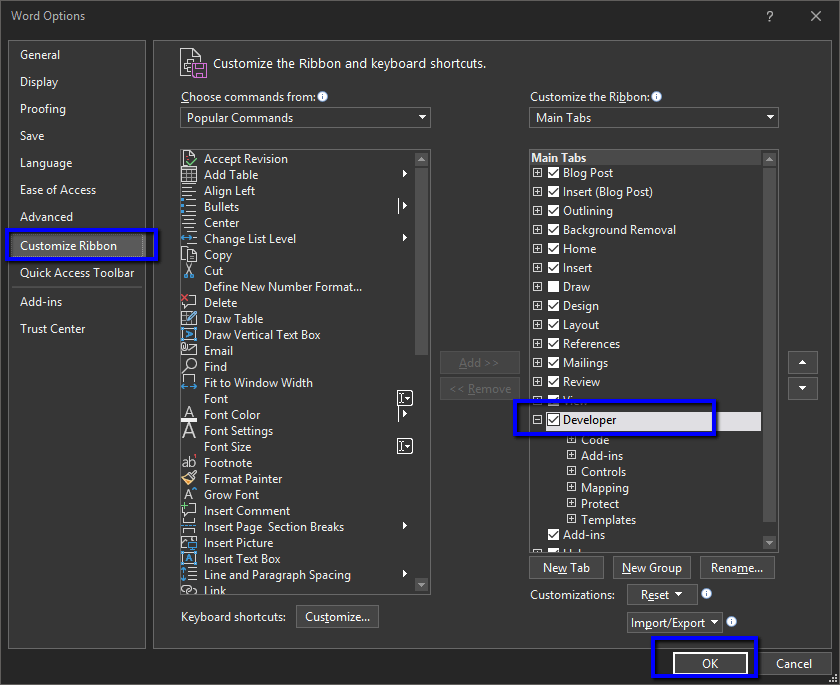
Enable the Developer tab if it’s not visible on Word Document. Go to File –> Options.

Click Customize Ribbon –> Tick Developer on Main Tabs –> Click OK.
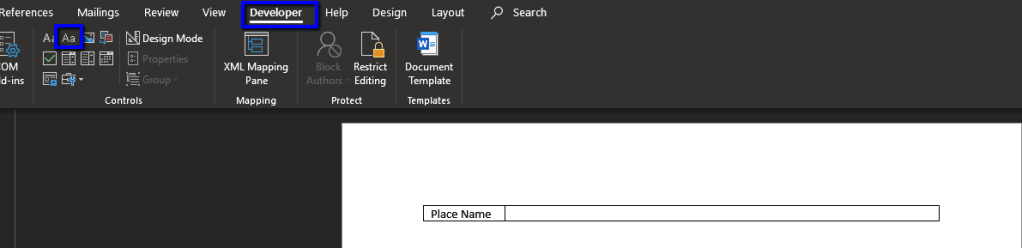
For placing lookup field, on Word document, go to Insert tab and insert a table (1 Row x 2 Columns).
Fill the left column as Heading and on the right column, we’ll put the content control.

Placing the cursor on the right column, click on Developer tab, and select Plain Text content control highlighted in Controls group.
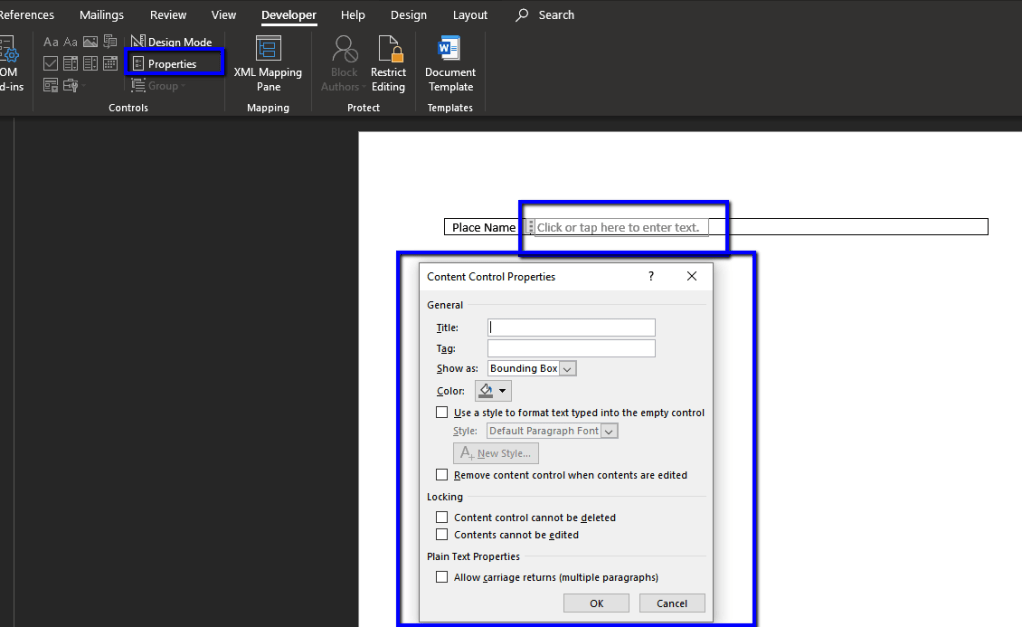
After inserting the control, select it and click on Properties under Developer tab. This will open Properties pop up wnidow where we can give a Title to the control and click OK.
For showing related records of Preferred Accomodation(lookup field), let’s insert a table(2 Rows x 3 Columns). Since we’re going to display 3 fields from the related records, we selected 3 columns.
Fill the 1st row with Heading of 3 fields that we are going to display i.e. Start Date, End Date and Amount.
On the 2nd row, for each column, insert Plain Text content control.
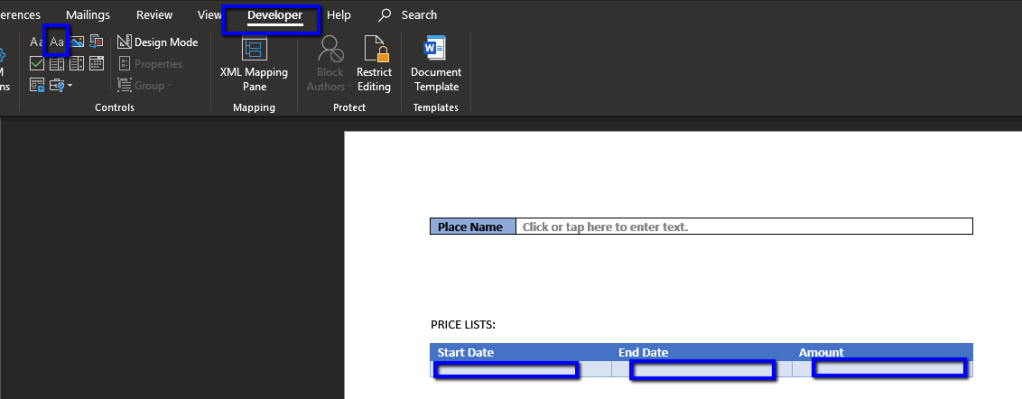
Select each control and give each a unique Title from Properies window like we did before for the field Place Name.

After giving unique title to all the 3 controls in the table, select the 3 controls together and under Developer tab, select Repeating Section Content Control highlighted below.
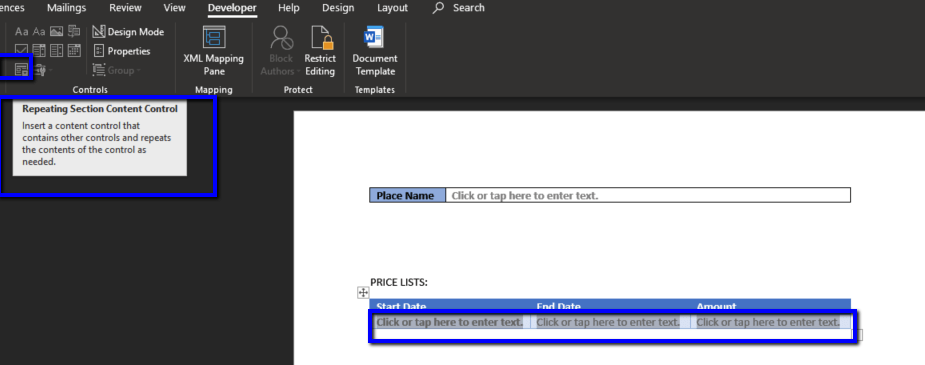
Then give this Repeating section content control a Title from Properties window.

We’ll see a + sign on the control as shown below after inserting Repeating Section Content Control.

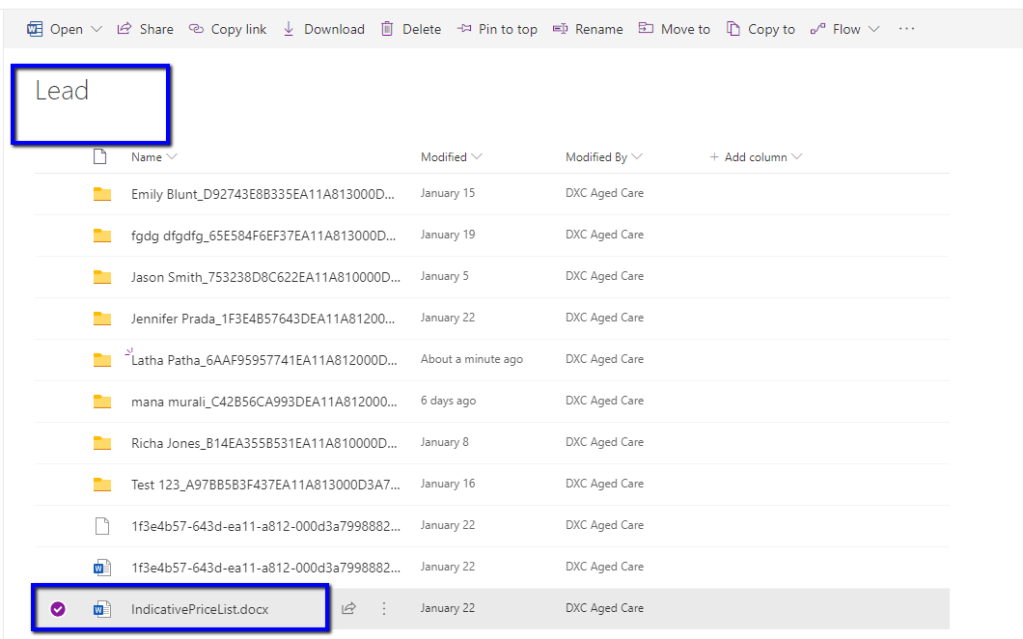
Save the word document and upload it to SharePoint. We saved the document at the root level Lead folder.
Now, let’s create PowerAutomate. Use
Connector: CDS environment
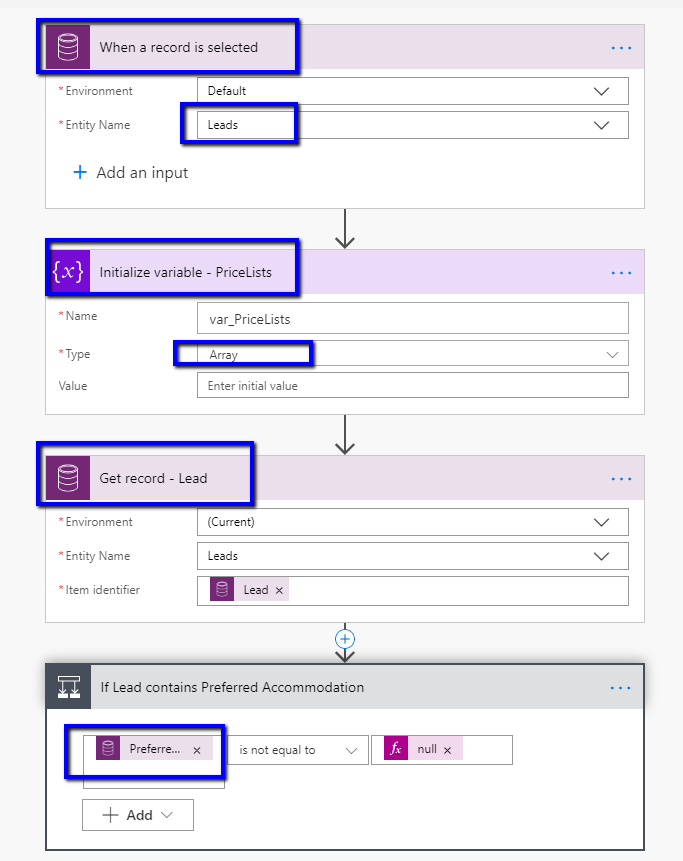
Trigger: When a record is selected
Entity Name: Leads
Add an Action –> Initialize variable.(We’ll use this variable to populate the related records)
Name: var_PriceLists
Type: Array
Add an Action using
Connector: CDS environment
Action: Get Record
Item Identifier: Lead(from When a record is selected action)
Add a conditional branch to check if Preferred Accommodation field(lookup field) of Lead contains data as shown below:
Let’s continue adding actions when the condition is evaluated to True.
Add an Action
Connector: CDS Environment
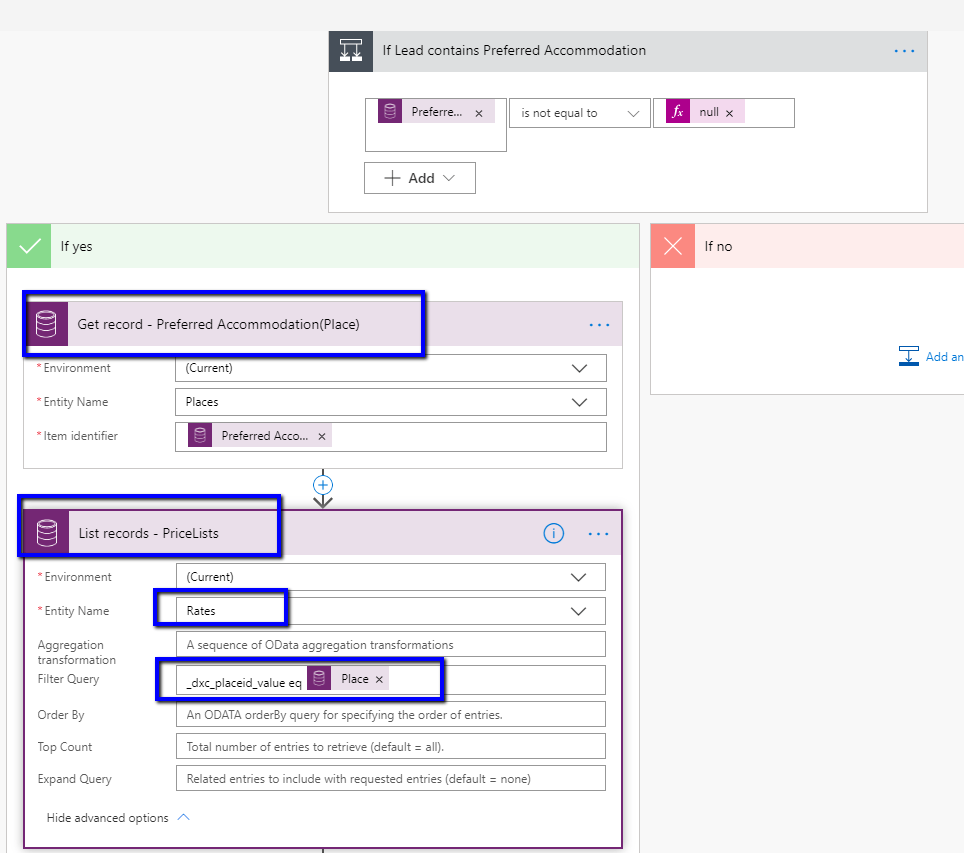
Action: Get Record
Entity Name: Places(entity for Preferred Accommodation field)
Item Identifier: Preferred Accommodation(from When a Record is selected action)
Add an Action to get related(Rates) records of Preferred Accommodation
Connector: CDS Environment
Action: List records
Entity Name: Rates
Filter Query: _dxc_placeid_value eq Place(from Get record Preferred Accommmodation(Place) action)
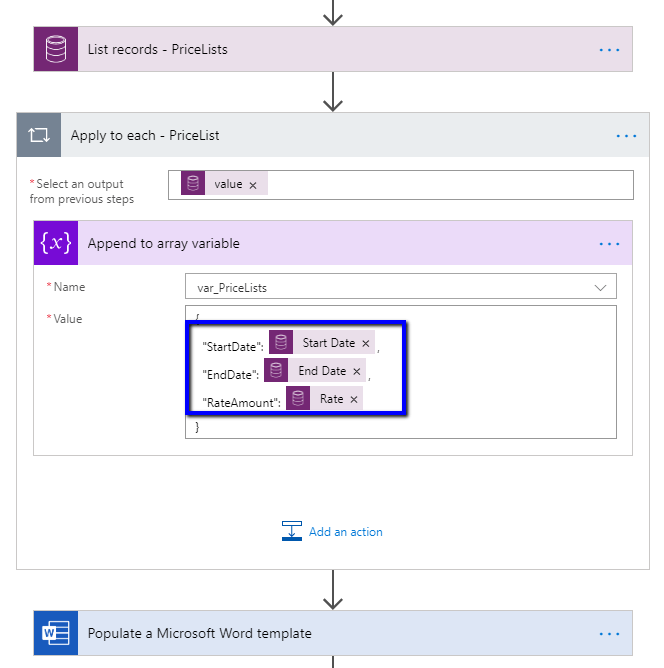
Add an action: Apply to each
Inside this action, add action: Append to array variable
Name: var_PriceLists(select the variable from the dropdown)
Value:
{
“StartDate”:(Start Date field from previous step output),
“EndDate”:(EndDate field from previous step output),
“RateAmount”:(Rate field from previous step output)
}
NOTE: The field names should be same as the name of the content controls used on word document.
Once, we append value to array variable, let’s get the word document with content controls from SharePoint where we had saved it.
Add an Action using
Connector: Word Online
Action: Populate a Microsoft Word template
Location: Select the Sharepoint site
Document Library: Lead(since we had saved at the root level of Lead entity)
File: select the file
After selecting the file, the content controls will appear.
For PriceLists: select the array variable var_PriceLists
For PlaceName: select Name(from Get record Preferred Accommodation(Place))
Then, let’s add an action for creating the word document with content controls populated at the respective Lead record’s SharePoint folder.
Connector: SharePoint
Action: Create a file
Site Address: Select SharePoint Site
Folder Path(Expression): concat(‘/lead/’,body(‘Get_record_-Lead’)?[‘firstname’],’ ‘,body(‘Get_record–Lead’)?[‘lastname’],’‘,replace(body(‘Get_record_-_Lead’)?[‘leadid’],’-‘,”))
NOTE: The folder path format is “Jennifer Prada_1F3E4B57643DEA11A812000D3A799888“
File Name(Expression): concat(body(‘Get_record_-_Lead’)?[‘leadid’],formatDateTime(utcNow(),’yyyy-MM-ddThh:mm:ss’),’.docx’)
NOTE: File Name format is “1f3e4b57-643d-ea11-a812-000d3a7998882020-01-23T05_55_30.docx”
File Content: Microsoft Word Document generated from the previous step

After word document is generated and saved to SharePoint, let’s convert the word document to pdf document.
Add an action using
Connector: Word Online
Action: Convert Word Document to PDF
Location: Select the SharePoint Site
Document Library: Lead(Since we have saved the word document inside Lead folder)
File(Expression): substring(body(‘Create_file_-_Quotation_Word_Document’)?[‘Path’],5,sub(length(body(‘Create_file_-_Quotation_Word_Document’)?[‘Path’]),5))
NOTE: This is the name of the word file(created in previous step) that will be converted to pdf.
After converting to pdf, let’s save the pdf document at the same location as where the word document has been stored.
Add an action using
Connector: SharePoint
Action: Create file
Site Address: Select the SharePoint Site
Folder Path(Expression): same as folder path of Create file – Quotation Word Document action
File Name(Expression): replace(body(‘Create_file_-_Quotation_Word_Document’)?[‘Name’],’.docx’,’.pdf’)
NOTE: The file name of pdf document is same as the name of word file except it’s extension(.pdf)
File Content: PDF document from the previous step(Convert Word document to PDF)

Then let’s save the PowerAutomate and test it.
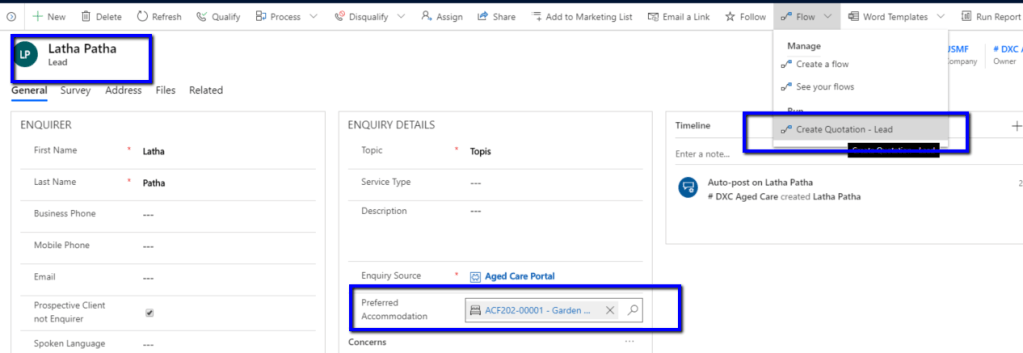
Go to a Lead record which has Preferred Accommodation. From Flow-> Run Create Quotation – Lead PowerAutomate.
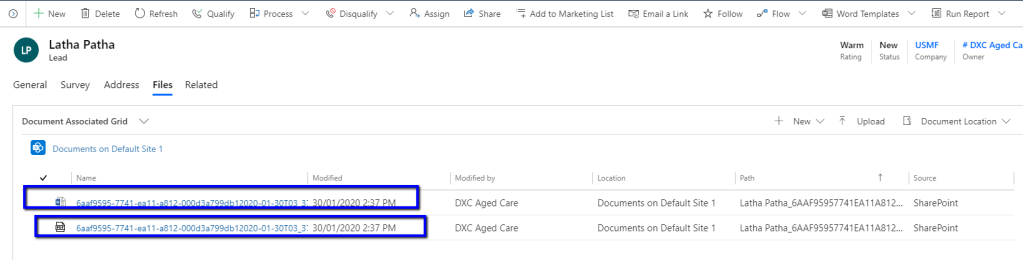
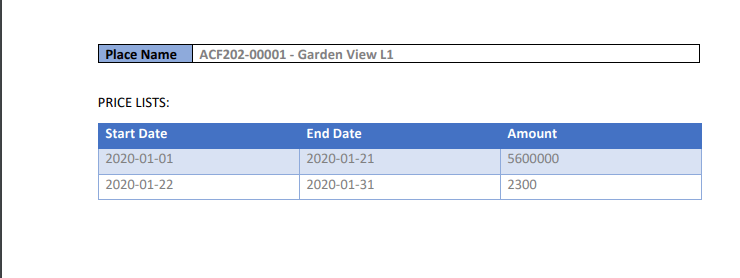
Once the PowerAutomate is executed successfully, let’s go to Files Tab and we can see that both word and pdf documents have been generated.
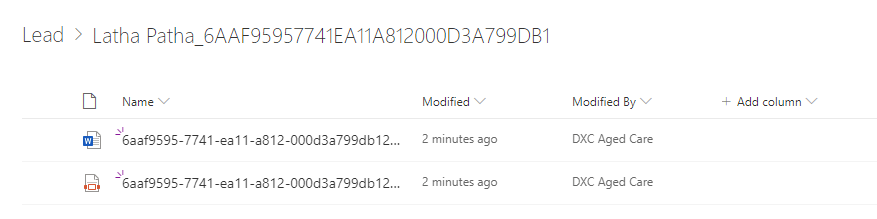
In SharePoint also, we can see that both word and pdf files are saved in the folder of appropriate Lead record.
Opening the pdf file, we can see that the content PlaceName and the related records(Rates) are populated.
Hope it helps !!


Thank for this well written article. I will like to know if it works when multiple records are selected. For example I go to a view in D365 and select multiple records will the flows create the template for all the selected records in sharePoint and automatically send email to selected records all at once.
LikeLike
Thanks Asabics. The flow we have used in this case is executed for a particular record. If you want to execute the same flow for multiple records, then you’d probably need to create a custom ribbon button and call the same flow for each selected record and that’d do the rest.
LikeLike